Remake an SVGA with Motion Agent
Published
Follow a beginner-friendly SVGA remake from upload to download. Write a theme, review the 10-credit generation plan, check the animated draft, and save it as an SVGA.
Take an animation you already have and give it a new theme. In this example, we turn a silver-and-green avatar frame into Emberforge with molten copper, dark volcanic rock and amber sparks.
1. Open Motion Agent and sign in
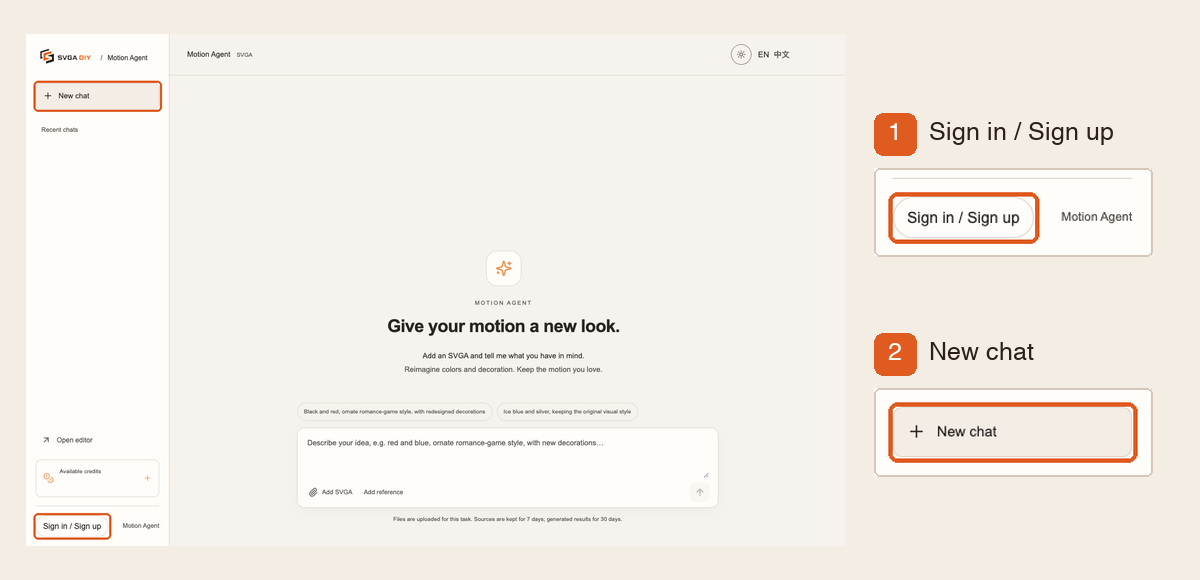
Open Motion Agent on a computer. If you see Sign in / Sign up at the bottom of the sidebar, click it and sign in with Google or an email code. Then click New chat near the top of the sidebar.
You’ll need an SVGA file under 20 MB that you can upload for processing. Keep 10 available credits for the generation step. You can review the plan first.
2. Attach your template
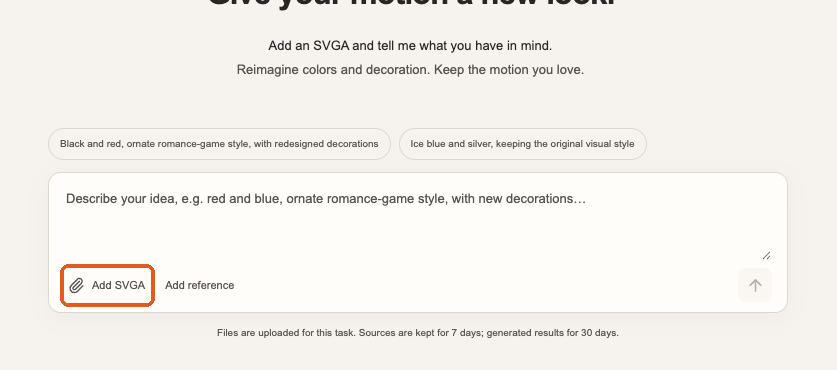
- Click Add SVGA below the message box.
- In the file picker, choose your original
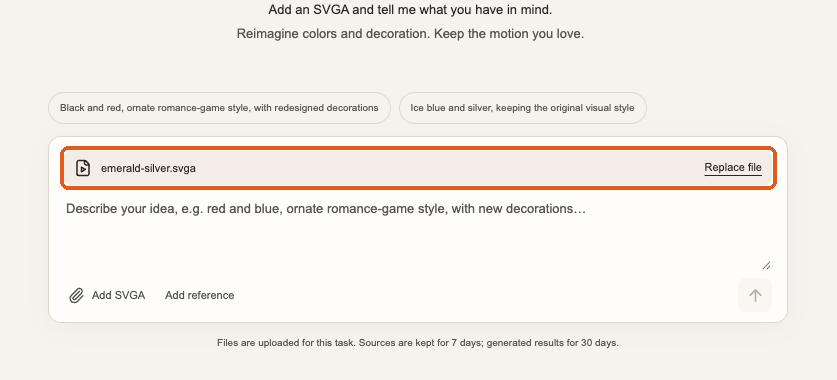
.svgafile and open it. The example usesemerald-silver.svga. - Look for the file name above the message box. If you picked the wrong file, click Replace file before sending.
3. Tell the assistant what to change
A simple brief works well. Name the theme, describe the main colors and decorations, then say what the new version should preserve. You can paste the example below or use it as a pattern for your own.
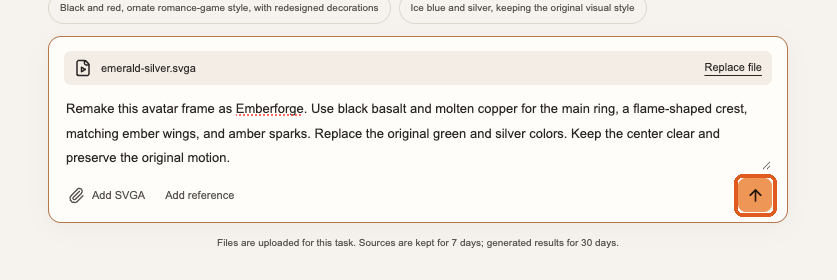
Remake this avatar frame as Emberforge. Use black basalt and molten copper for the main ring, a flame-shaped crest, matching ember wings, and amber sparks. Replace the original green and silver colors. Keep the center clear and preserve the original motion.
Click the orange Send arrow at the bottom right. Motion Agent uploads the file for processing and prepares a Remake plan.
4. Check the plan before generating
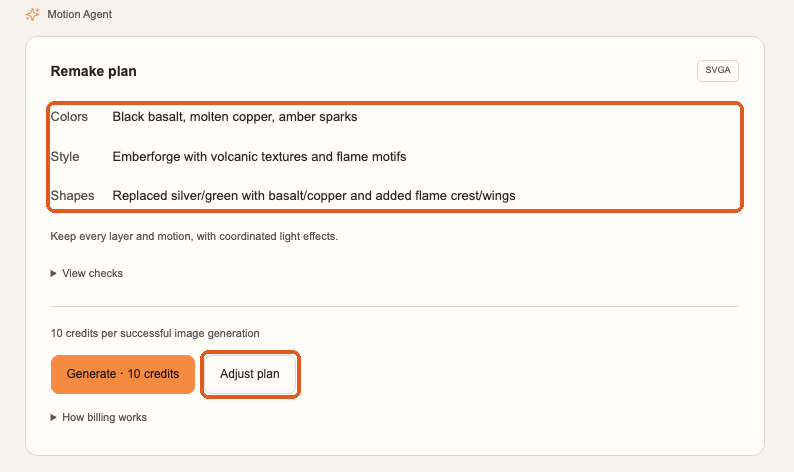
Read the Colors, Style and Shapes rows. For this example, check that the plan mentions molten copper, dark rock and fire-themed decoration. Also check the line about keeping the layers and motion.
If the plan misses an important detail, click Adjust plan, enter your correction and send it. Read the updated card before you start generation.
5. Generate and return to the same chat
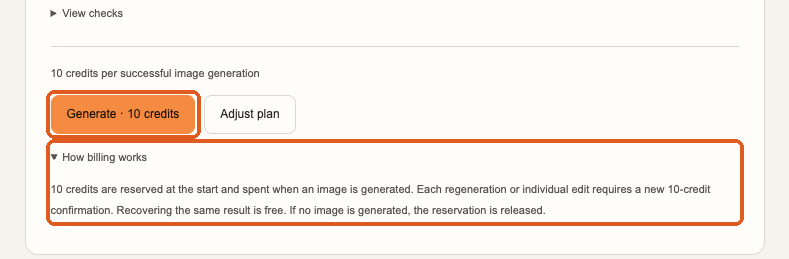
Open How billing works to review the cost. Click Generate · 10 credits when ready. The assistant reserves 10 credits at the start and spends them when an image is produced successfully. The reservation is released if no image is produced. Another generation or an AI edit to one part asks for a separate confirmation.
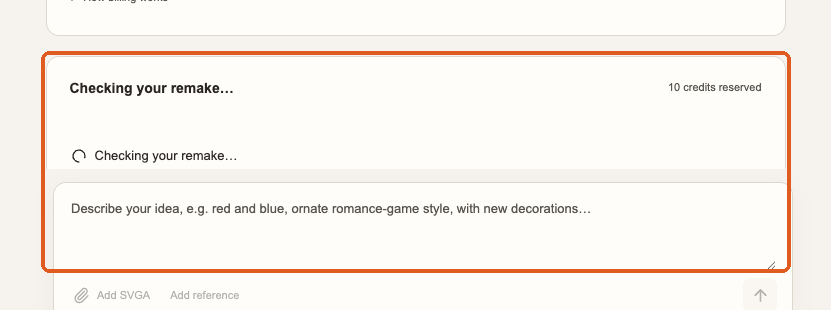
While the assistant works, the result card shows its progress. You can leave and reopen the same conversation. Wait for Preview and adjust before working on the draft.
6. Compare the original and draft
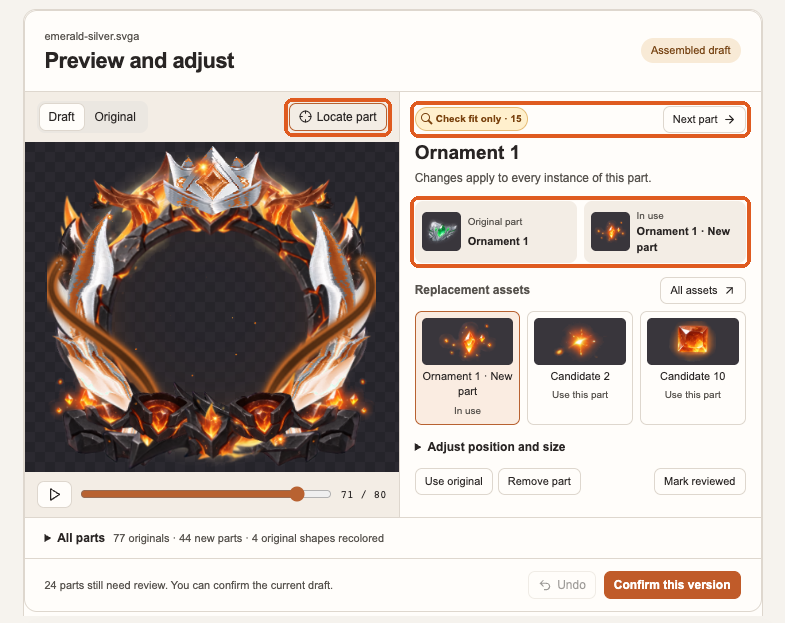
In Preview and adjust, click Original to see the source. Click Draft to return to the new assembly. Use Play to watch at least one full loop, then pause and drag the frame slider to inspect a particular moment.
For an avatar frame, check that the center stays clear, the side decorations move with the frame, and the outer edges have room throughout the loop.
7. Check one part at a time
Once the whole draft looks close, use the controls on the right.
- Click Next part to move to the next item that needs review. You can also expand All parts under the preview to pick a specific part.
- Click Locate part above the preview. Look for the highlighted part in the animation.
- Compare Original part with In use on the right. Choose a shape asks you to check the visual match. Check fit only asks you to check how the part sits in the frame. Some positions can still use the original part or a recolored original shape.
8. Fix any part that looks out of place
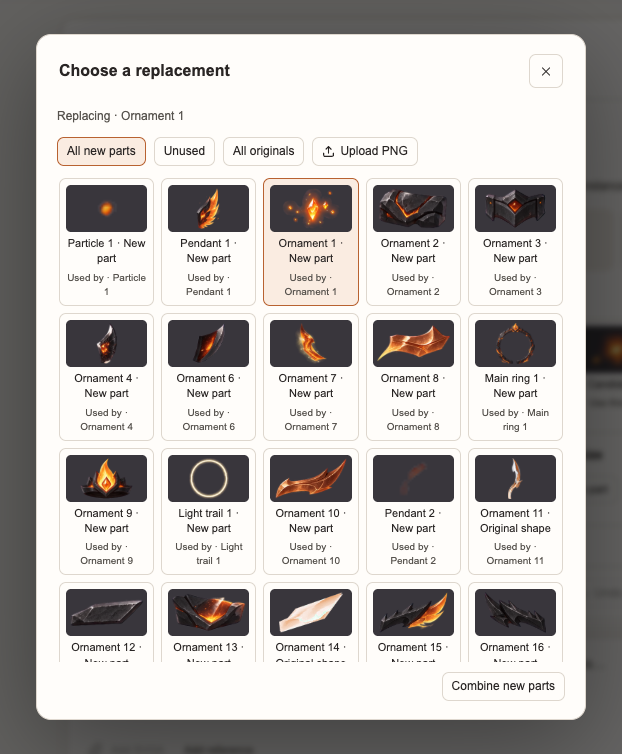
- Change the artwork. Click All assets in Replacement assets. Select a new part and check the full frame again. The picker also offers All originals and Upload PNG.
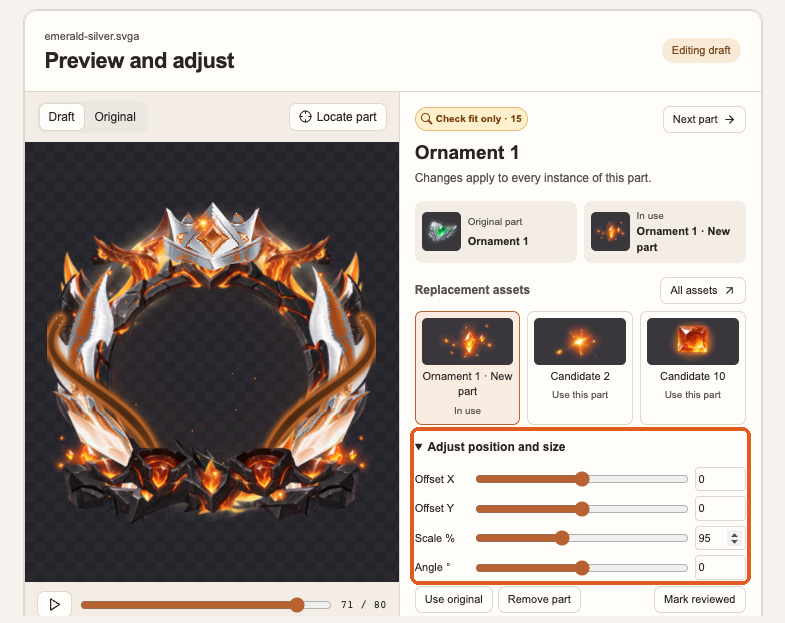
- Change the fit. Open Adjust position and size. Start with a small change to Offset X, Offset Y, Scale % or Angle °. Check how it looks in motion. A change also affects other instances that share that part.
- Keep the result. Click Mark reviewed when the part looks right. If a change made things worse, use Undo below the review card.
9. Confirm the version you want to keep
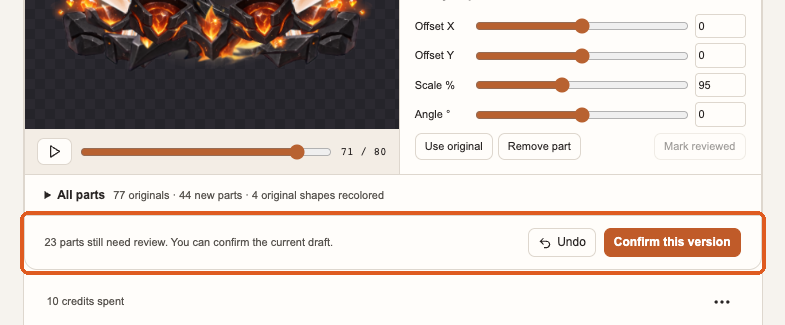
Play the draft once more. The line at the bottom of the card tells you whether any parts still need review. You can confirm the current draft with review items remaining. Check the items that matter to your design before saving.
Click Confirm this version, then wait for Confirmed version and the download controls.
10. Download and check the SVGA
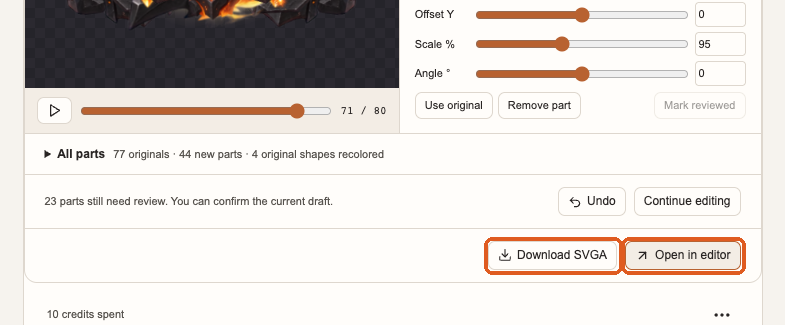
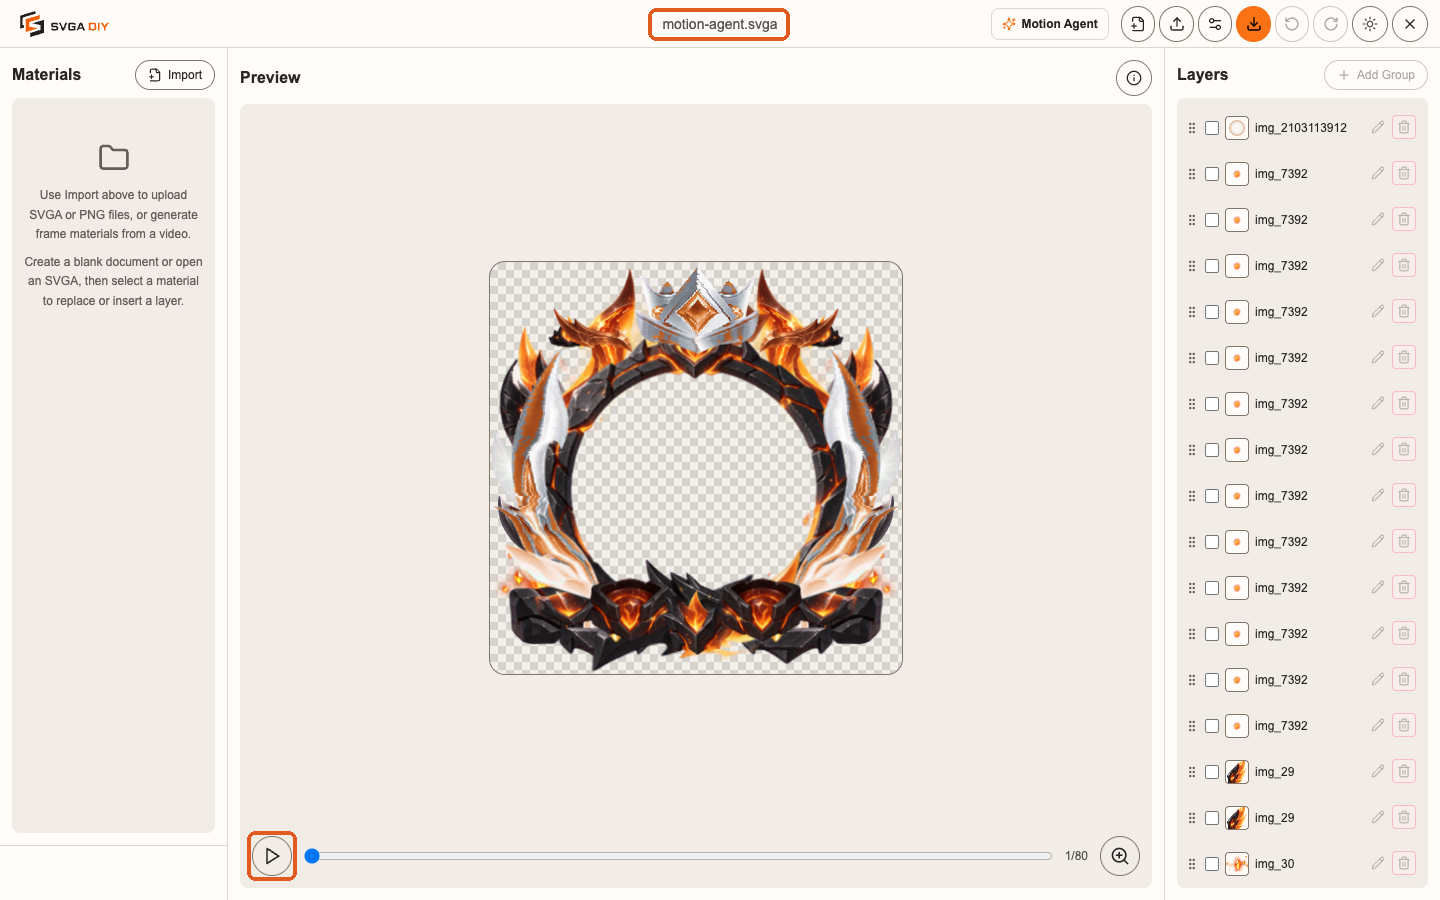
Click Download SVGA and save the file somewhere you can find it. You can also choose Open in editor on that card to load the same confirmed version in a new tab. Play it there to check the result, or open the downloaded file in SVGA Preview.
If the frame will run on multiple platforms, use the cross-platform SVGA preview tutorial to compare playback and spot rendering differences before you ship it.
If you get stuck
- The file name doesn’t appear. Check that you chose the
.svgafile, that it’s under 20 MB and that it can open in SVGA Preview. - Generate stays disabled. Wait for the plan to finish and check that you’re signed in and have at least 10 available credits.
- A draft is missing or the same result needs another processing pass. Check the original conversation first. If the result offers Recover result (free), use it to reprocess that generation. A new generation is a separate action.
- The result looks right but there’s no download button. Use Confirm this version in the review card and wait for it to finish. Download the file while the result is available. The assistant keeps source uploads for 7 days and generated results for 30 days.